Are you a Hard-Core Photo Nerd?
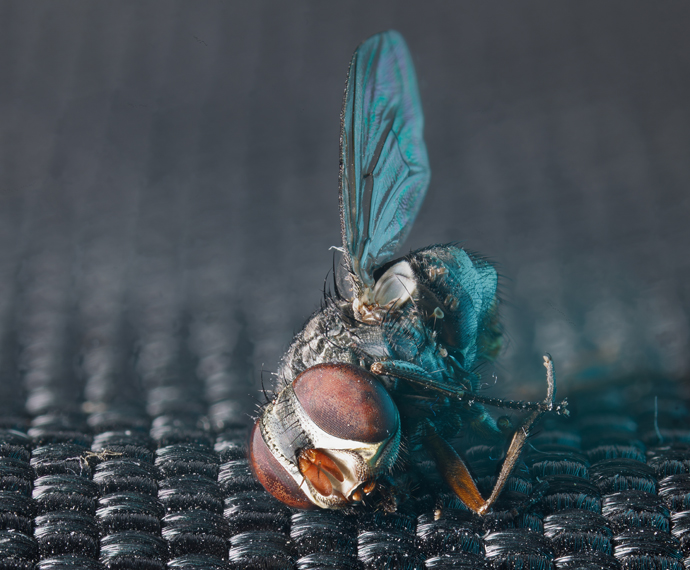
This article is a followup to the Extreme Macro Results post I made. It is only meant for those readers who are very technically oriented.
About this Post
This post is a bit unorganized. I’m posting below tidbits of knowledge gleamed from the hundreds of hours I spent planning, capturing, and post-processing during my Extreme Macro experiment.
Equipment
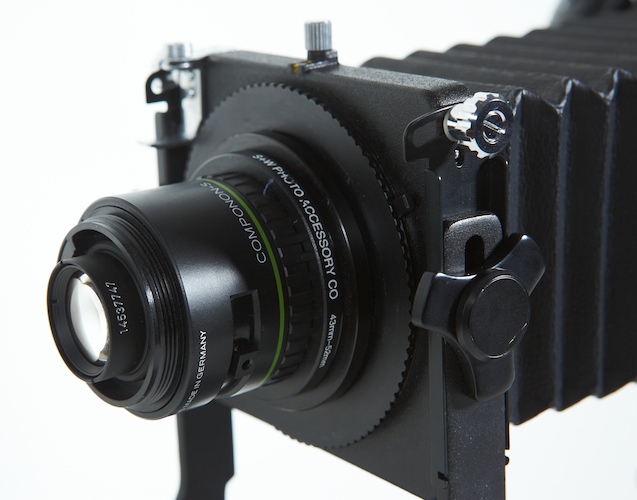
Click the images below to enlarge and to read the description of each.


.")


Lenses
The following lenses were selected because they are optically optimized for high magnification. The microscope lens is designed for high-magnification for obvious reasons, but the enlarging lens may not be immediately intuitive choice. These lenses are designed to mount to an enlarger and project a small piece of film onto a large piece (relative to the film) of photo paper. Therefore, when mounted backwards on a camera they take a very small real world object and project it onto a large (relative to the subject) sensor.
- Leica Photar 25mm f/2.5 Microscope/Micro-Photography Lens
- Schneider 28mm Componon-S f/4 Enlarging Lens
- Schneider 50mm Componon-S f/2.8 Enlarging Lens
Bodies
The bodies were selected to allow easy and extensive extension of the lens away from the body.
- Phase One 645 AF body with Mamiya Auto Bellows N
- Sinar X 4×5 View Camera
Precision Motion Table
The Velmex precision motion table is generally used in industrial applications where precision in the range of +/- 0.001″. It was selected for this project because I needed to divide a centimeter or so of motion into 400 frames. This allowed me to move a fly head a dozen or so microns at a time.
Technical Challenges
Diffraction
Diffraction is a loss of sharpness due to a too-small aperture. At high-magnifications diffraction is a major issue because it is based on the effective aperture, not the aperture as-marked on the lens. Below are two images showing f/11 with no extension of the bellows (the lens and sensor are very close to each other) and f/11 with 6 inches of bellows. As you can see the same physical opening is apparently and effectively smaller when bellows extension is added.

Diffraction Math
- Effective aperture = Marked aperture * Square-Root(1 + Magnification)
- Magnification = Subject Size on the sensor / Subject Size in real life
- Magnification = [Extension – Focal Length] / [Focal Length]
*Extension is the distance from the nodal point of the lens (usually the center of the lens with simple-design lenses) to the sensor
- Low Magnification Example: the Schneider 50mm Lens with 6 inches (approx. 150 mm) of extension would have a Magnification of 2:1 and the effective aperture will be 1.7 times higher than indicated. So if the lens was marked to f/8 the effective aperture would be about f/ 13.
- High Magnification Example: the Leica Photar 25mmLens with 17 inches (approx. 450mm) of extension would have a Magnification of 18:1 and the effective aperture will be about 4.4 times higher than indicated. If the lens was marked to f/2.8 the effective aperture would be about f/12.
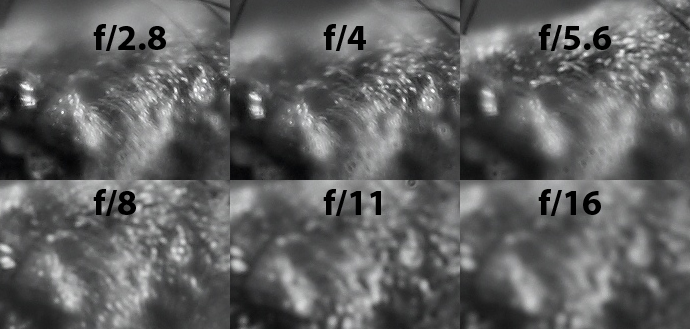
Diffraction Ramifications
In high-resolution high-magnification macro photography diffraction may kick in on the very first aperture. However, lenses are not usually their absolute sharpest wide-open due to optical imperfections. So where will the balance of diffraction and lens sharpness fall? See below some real-world examples of when diffraction does and does not kick in. My experience with this project is that for every single lens/subject/magnification it’s simply most useful to do real-world diffraction bracketing using the math as basic guidelines only.

Stitching Errors with Helicon Focus
Helicon focus is a depth-of-field-stacking program with incredible abilities to compensate for slight changes in registration and exposure. Here are hints from my trial-by-fire:
- Order Matters – make sure to sort them and keep them in order. In the Source Images Pane ensure that the subject/focus is closest in the first frame.
- Radius Matters – too small a radius results in blob-like artifacts in the shadows
- Retouching – use the last layer to retouch OOF areas to be consistent
Registration/consistency
Registration and consistency is critical cecause several hundred images will be stitched together for the final product. Here are precautions I took:
- triggering the exposure remotely
- moving the subject rather than the camera
- using the Velmex ultra-precise motion table to ensure micro-meter accuracy
- Profoto Lights (1/100th of a stop accuracy)
- Exposing without a moving shutter or aperture
How did I expose without a moving shutter or aperture? I used a Phase One digital back which can be set to begin and end an exposure using a small exposure box sold by Capture Integration. I used this box with the following workflow: 1) connect the lights & digital-back with a standard sync cable, 2) connect the exposure-box to the digital-back 3) manually stop down the lens 4) manually set the focus 5) using the exposure-box to trigger the exposure and flash. Doing this in a very dark environment, combined by the high effective aperture of the lens, means there is no (meaningful) ambient light in the final exposure.
Manual Stop Down of Automatic Lenses off-camera
In order to use the Phase One 80mm lens I had to find a way to stop down the aperture of the lens. The problem is that aperture control is completely electronic with this and most other modern lenses; so you can only stop down the lens when mounted on a body such as the Phase One 645 AFD body – either by taking a picture or by using the Depth-of-Field-Preview button. These cameras are sophisticated and if you turn the camera off while the Depth-of-Field-Preview button is pushed it will release the aperture to wide-open before turning off. The trick I discovered is to turn the body on, hold the Depth-of-Field-Preview button and then remove the batteries of the body. The body will not have the chance to release the aperture and you can use the lens off-camera stopped down.
One response to “Macro Extreme (technicals)”
[…] aperture of the lens). Movements can help reduce the number of frames you'll need to stack though. Effective aperture and extreme macro article – in this article I'm talking about higher magnification like 5:1 where you're talking about 1:1. […]